Rustic End Table With Drawer Plans
Difficulty
Intermediate
| 
Build your ain end tables! These gorgeous rustic style stop tables are built from 2x4s and lumber. We love the large size and the open bottom shelf. Stain or pigment whatsoever color. Our beginner friendly plans make it easy with step by step diagrams, shopping listing and cut list.
As well in this Collection: Rustic X Panel Table, Rustic X Java Tabular array and Rustic X Bench Plans

Dimensions
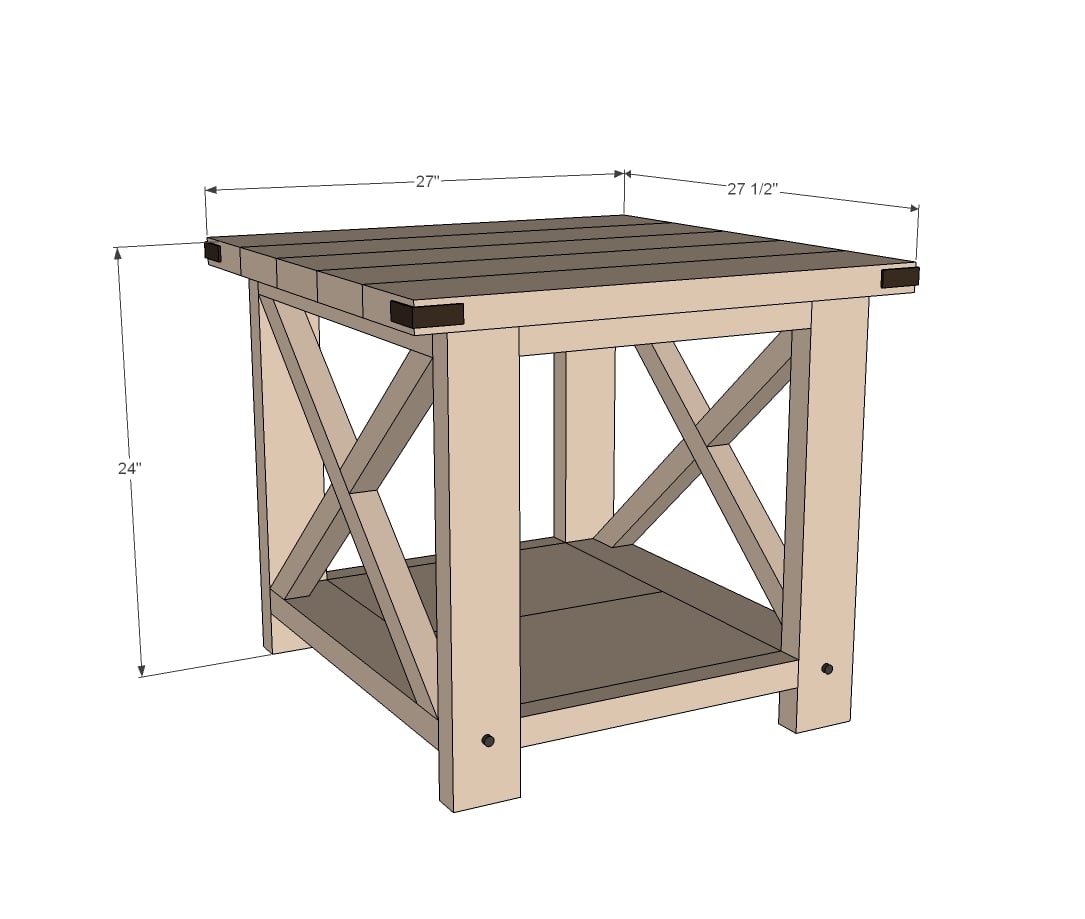
Dimensions shown to a higher place.
Preparation
Shopping List
- 2 - 2x4 @ 8 feet long
- 1 - 1x12 @ 3 anxiety long
- 2 - 2x2 @ 8 feet long
- 2 - 2x6 @ 8 feet long corner subclass hardware decorative bolts
- 2 1/two" and 1 i/4" Pocket Hole screws
- forest glue
Cut List
- 8 - 2X4 @ 22 1/2" - Legs
- 4 - 2X2 @ 16" - Trim
- two - 1X12 @ 16" - Bottom shelf
- 2 - 2X2 @ 26 i/two" (LONG Point TO SHORT POINT, ENDS ARE PARALLEL, 50 DEGREES OFF Square) *
- 4 - 2x2 @ 13 1/four" (Longest edge, one cease cut at 50 degrees off foursquare, other end cut at 10 degrees off square, see diagram) *
- five - 2x6 @ 27" - Top
*Yous may wish to trace and cut these in place

Full general Instructions
Please read through the entire plan and all comments before offset this projection. Information technology is also advisable to review the Getting Started Section. Take all necessary precautions to build safely and smartly. Work on a clean level surface, free of imperfections or debris. Always use straight boards. Check for square after each pace. Ever predrill holes before attaching with screws. Use glue with finish nails for a stronger hold. Wipe backlog gum off blank wood for stained projects, every bit dried glue will not take stain. Be safe, have fun, and ask for help if yous need it. Adept luck!
Instructions
Step 1
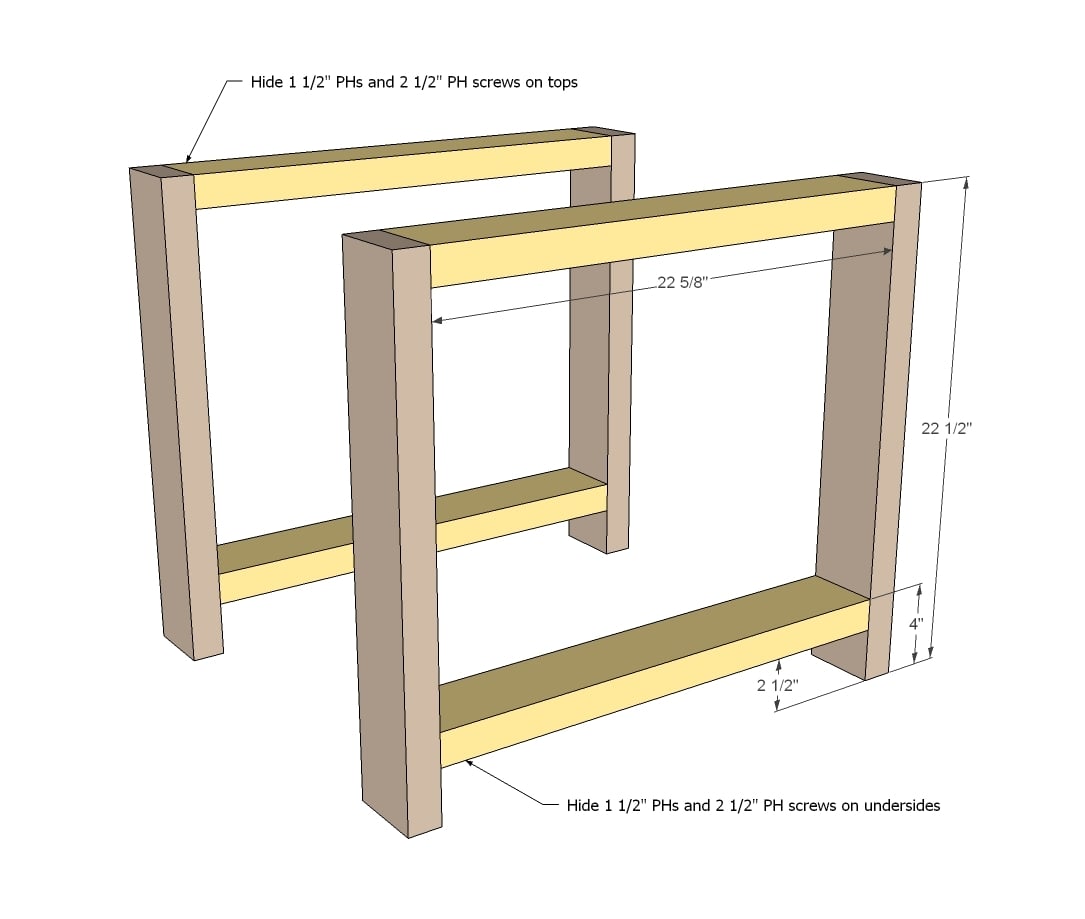
Outset past building two ends as depicted in diagrams. You tin also attach with countersunk 2 1/ii" screws and glue.
NOTE: Xanthous board width should be 22 i/2"
Footstep ii
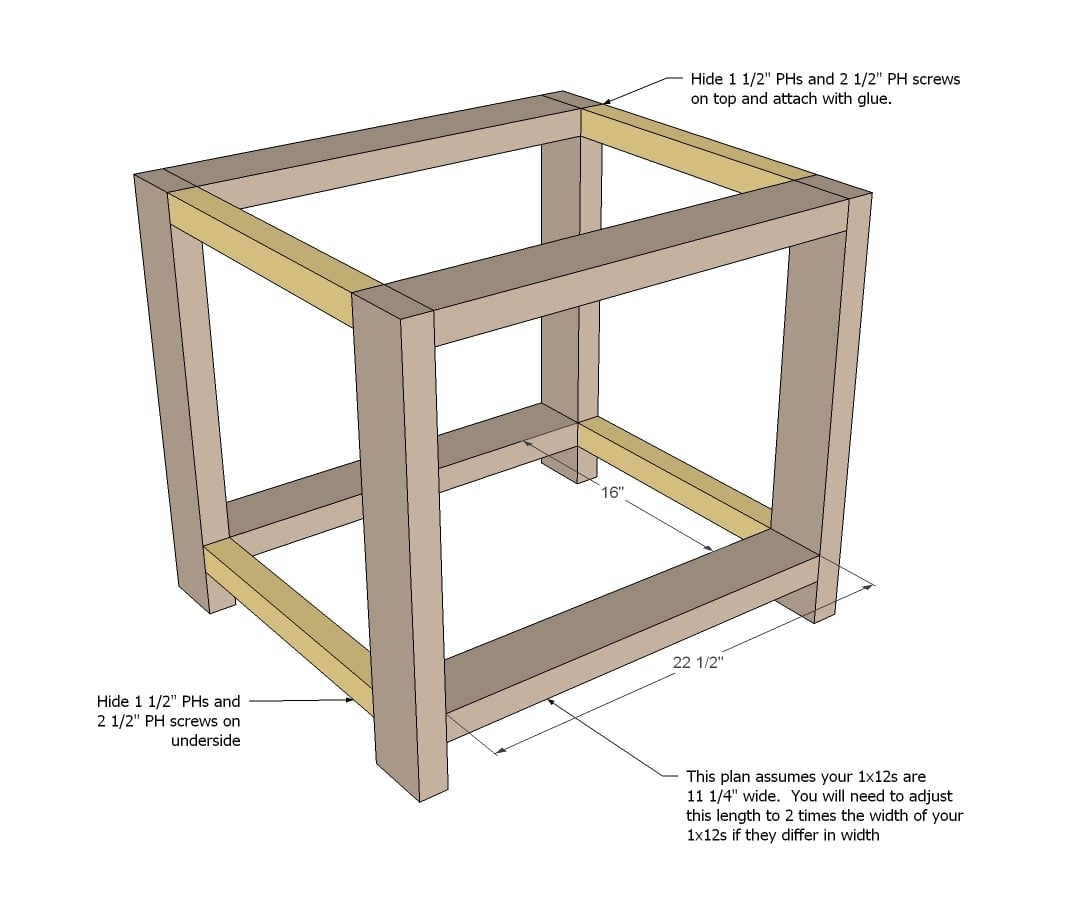
Next adhere the 2x2 sides.
Step iii
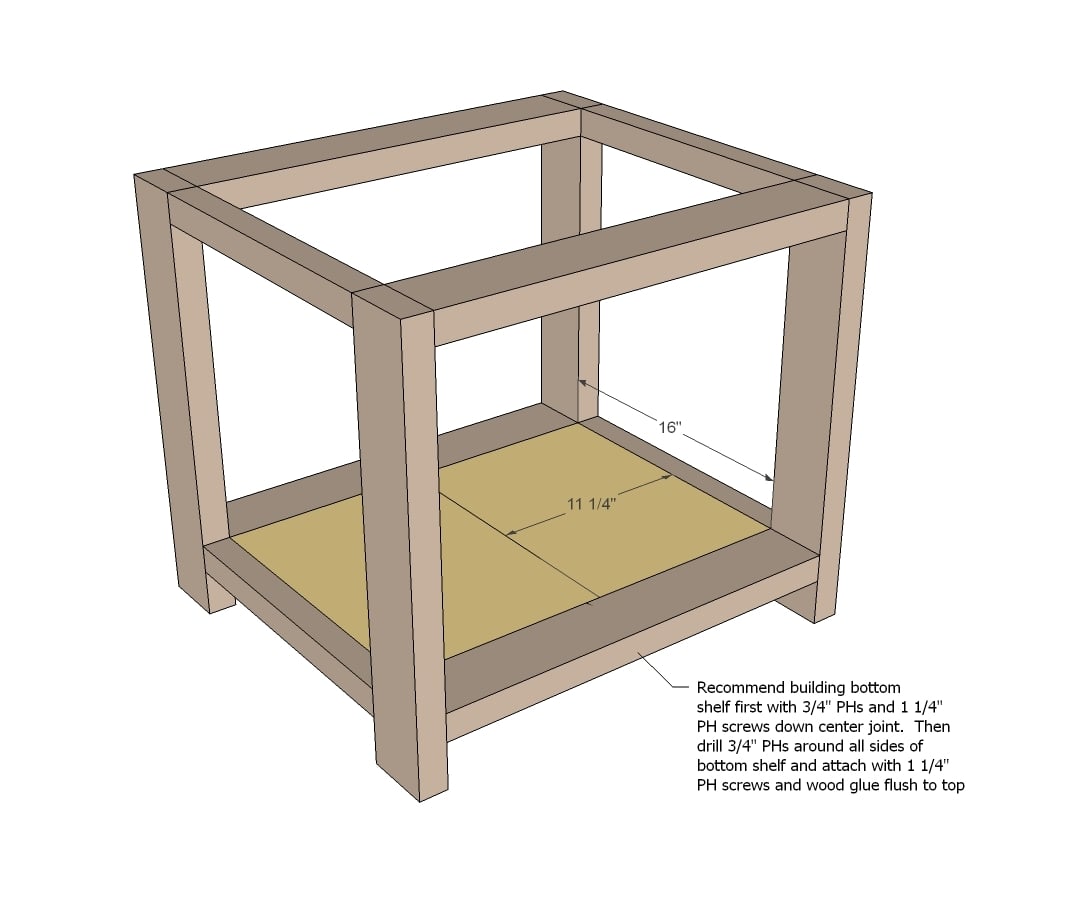
So build your bottom shelf and attach to lesser of panel.
Pace 4
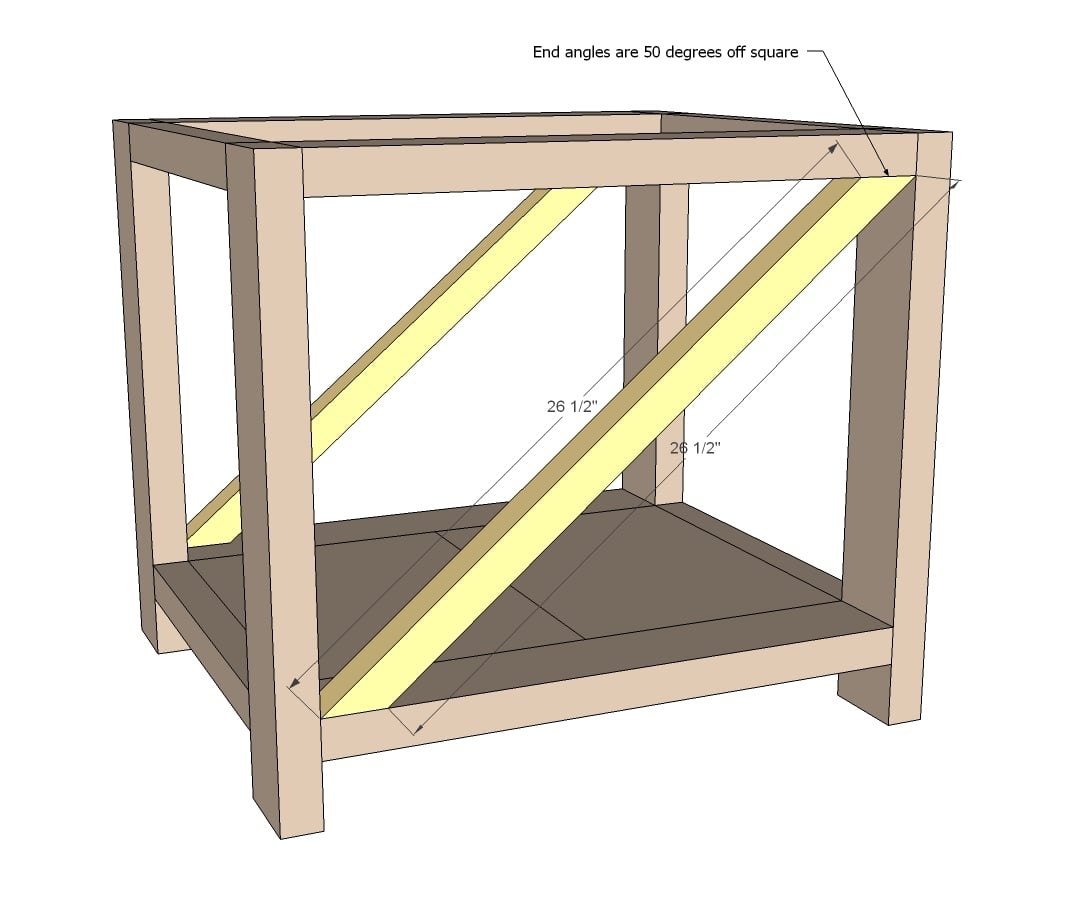
Now it's time to fit your cross braces. A standard miter saw should cut a 50 degree angle off square. If not, you will need to marker information technology with a square (remember 50 degrees is off foursquare, so that ways the angle off the board edge would exist xl degrees.
Another trick is to simply hold the lath in place, mark the angles, and cutting. These aren't support boards or annihilation similar that, so some glue and a few nails or countersunk screws from top/bottom will do the trick.
TIP: We recommend building the entire 10 first, the attaching the consummate Ten inside the terminate table.
Step 5
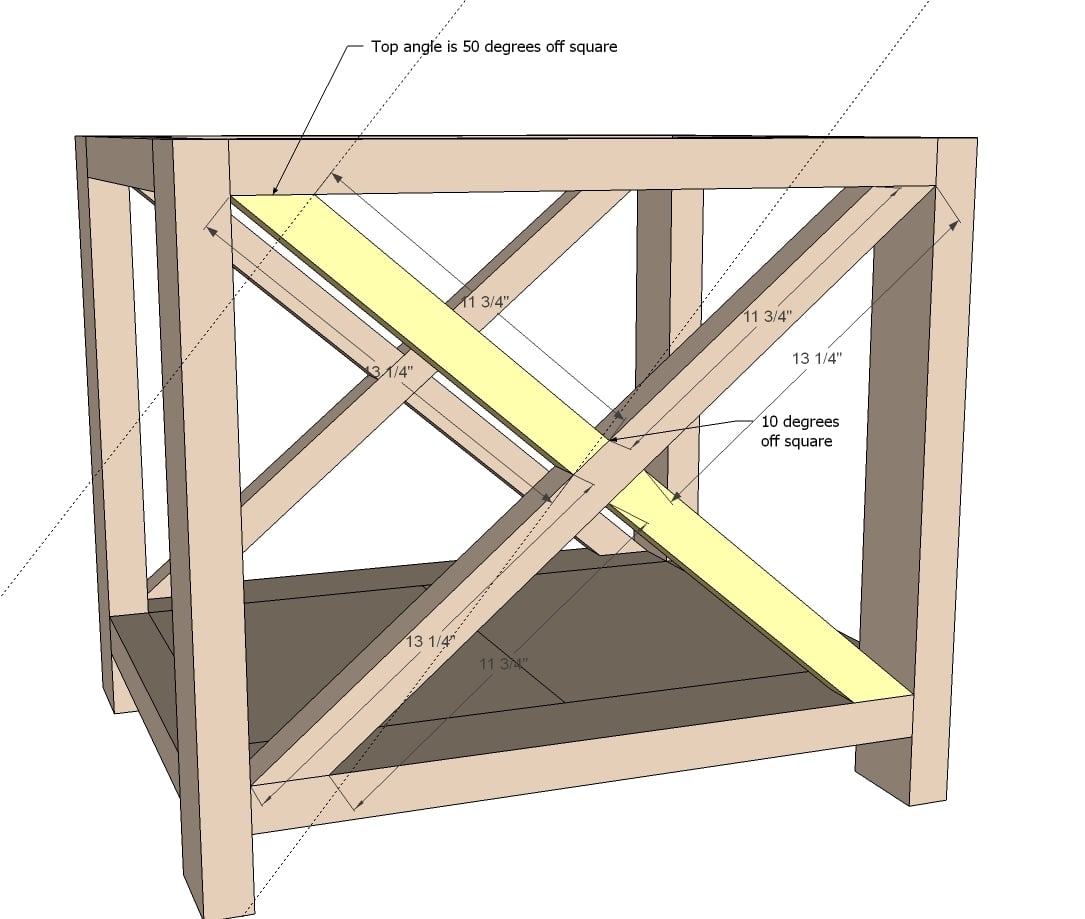
The smaller X pieces can be cut to fit. Attach with a one-1/2" pocket hole and 2-1/two" pocket hole screw, one screw per joint.
Step six
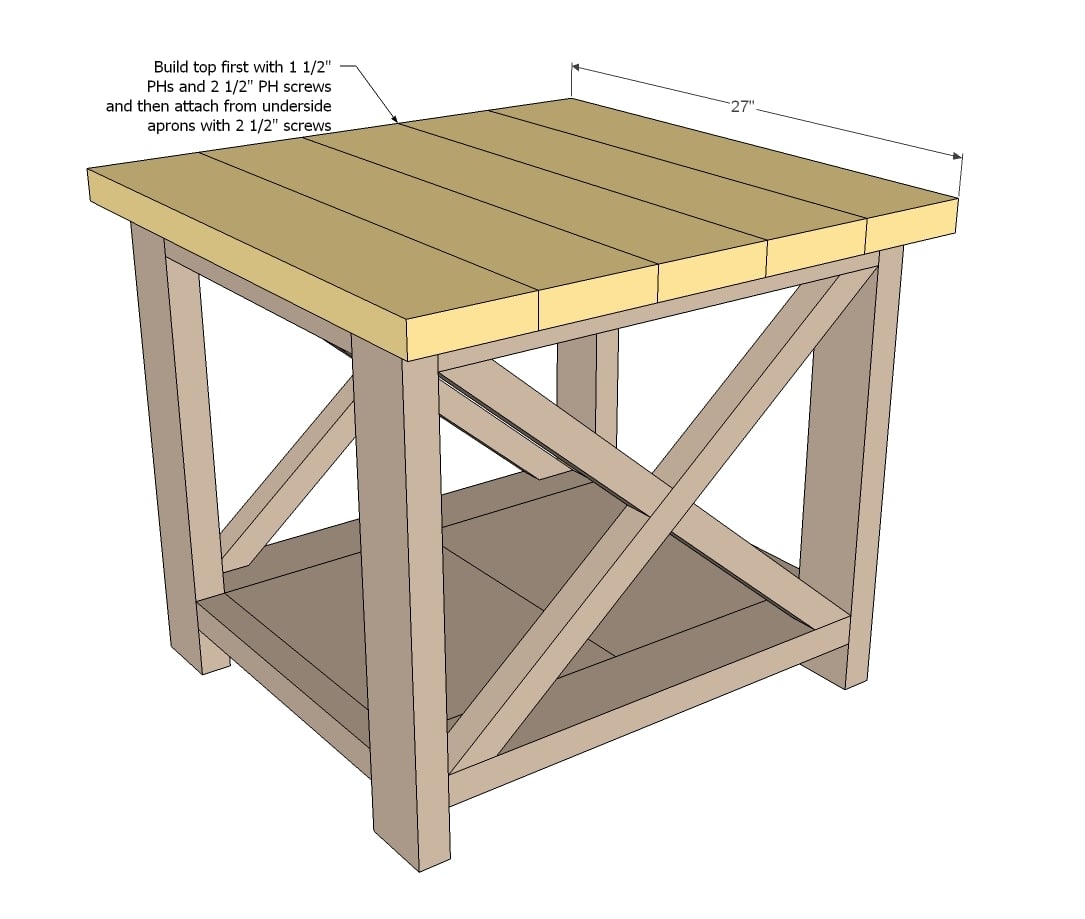
Next build your peak ... and adhere in place with countersunk 2 1/2" screws. If you have the PH screws on hand, I but use a few of those!
Step 7
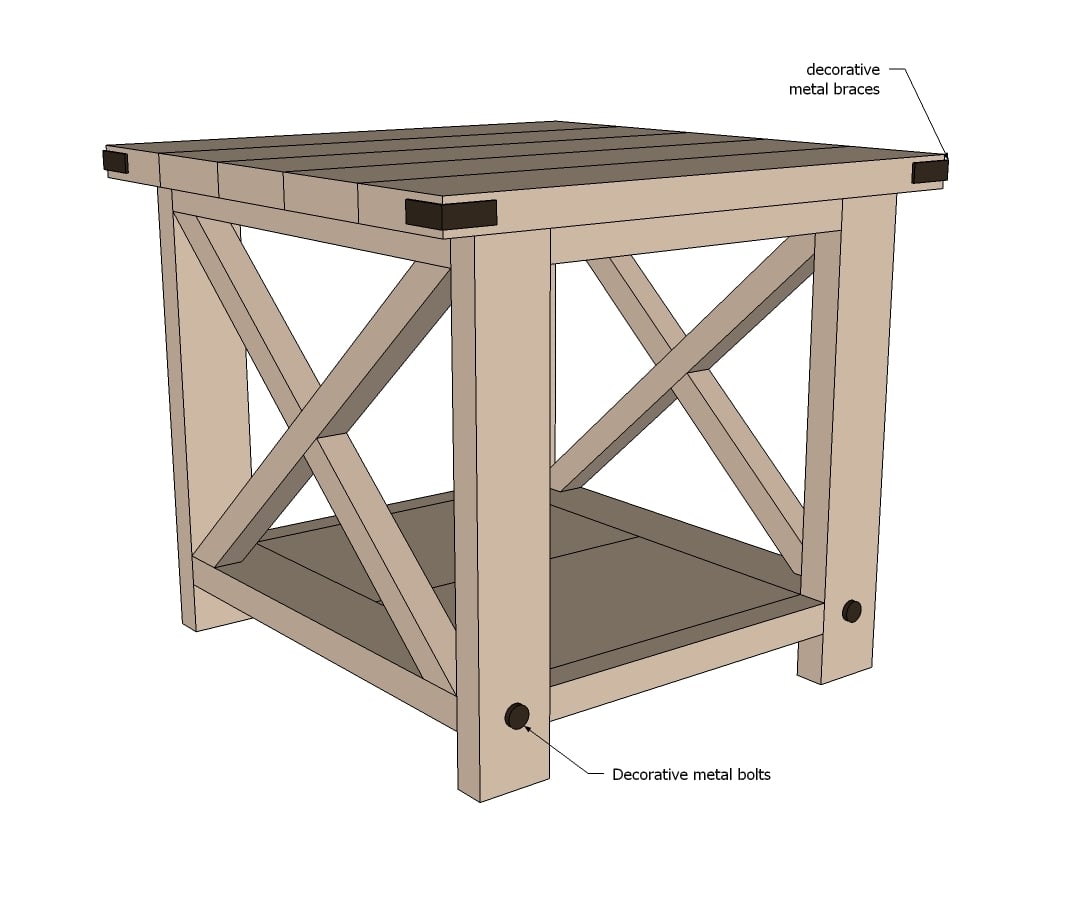
And then add the decorative hardware!
Preparation Instructions
Fill all holes with forest filler and let dry. Apply additional coats of wood filler as needed. When woods filler is completely dry, sand the project in the direction of the forest grain with 120 grit sandpaper. Vacuum sanded project to remove sanding residue. Remove all sanding residue on work surfaces as well. Wipe projection make clean with damp fabric.
It is ever recommended to apply a test coat on a hidden expanse or flake slice to ensure colour evenness and adhesion. Use primer or wood conditioner as needed.
Source: https://www.ana-white.com/woodworking-projects/rustic-x-end-table
0 Response to "Rustic End Table With Drawer Plans"
Post a Comment